Make your own dinosaur felt cushion

Last week we made a fabulous little owl cushion which the Bear got for Christmas as a craft pack. It was a really quick make that was easy and really simple for little people to get their heads – and hands! – around.
However, as soon as we were finished, the first thing that Henry said was “where mine?” with a sorrowful little face on him. It’s a face I can’t resist and because he knows his mama so well and has me wrapped around his little finger, I scurried off to see what I could whip up for him. Here’s what I came up with.
Now – just to manage your expectations – this is very basic. It’s designed to allow the little people in your life to help out at every stage and for that reason it’s quick and it’s easy. When I asked Henry what he wanted on his cushion, I wasn’t surprised by the answer: a dinosaur!
DINOSAUR FELT CUSHION – WHAT YOU NEED
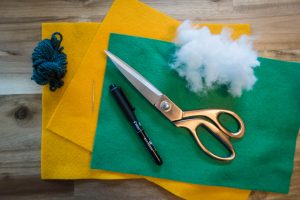
To make our dinosaur felt cushion we used the following:

- Felt – 2 sheets for the main cushion
- Felt – 1 sheet for the pattern
- A darning needle
- Scrap wool
- A marker pen
- Scissors
- Stuffing
- Fabric glue
TOP TIP – I don’t often buy stuffing as when I replace our cushions, I always remove the stuffing to use in projects. Remove from the cushion and store in a zip lock bag (removing all the air) and it’s surprising how far you can make it stretch!
DINOSAUR FELT CUSHION – WHAT WE DID
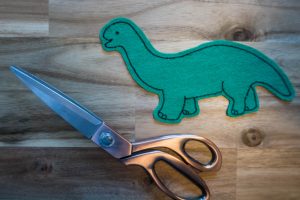
This really is such a simple activity to do with little ones. First, you need your design. This bit is adult only really if you have something specific in mind. You need to take your contrasting piece of felt and draw your design on with the marker pen. Then, cut out the shape.
We used green for our dinosaur (for obvious reasons) and originally, I just planned to use the outline for our dinosaur felt cushion. However, when I drew him on, he actually looked cute, so I decided instead to add a few details and use him with all the lines showing

There’s nothing to say that little ones can’t draw their own art for their cushions though. Therefore, if that’s the route you want to go down, just lay out their felt as you would paper and let them enjoy creating their own masterpieces. When ready, cut out whatever shape you have ready to put onto your cushion.
For this – to keep the kids involved – we just pained on fabric glue. Should you want to stitch it on though then you need to sew your design onto one of the main cushion sheets of felt at this stage. However, if – like me – you’re keeping it simple with glue, then you can put your design to one side for now.

For the main cushion all you need to do is place your two pieces of felt together, lining up the edges. Thread the wool on to the darning needle and roughly sew around the edges. You’re looking for a rough look to this. I get my kids to help by pulling the needle and wool tight after I push the needle through. It takes ages but the kids love it.
Leave a few inches and stuff your cushion. Sew up the gap.

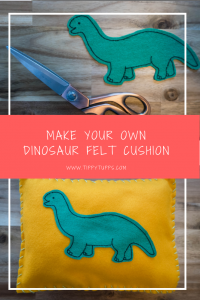
At this stage I had a comfy A4 sized cushion and a cute little dinosaur. So, all I needed to do was bring the two together using fabric glue. Make sure you are generous with it, and give it plenty of time to dry.
Et viola! You have the quickest and easiest little dinosaur felt cushion that was that simple to make. It’s a great toddler / pre-schooler craft to keep them entertained for a little while!

The only question is, what would you put on your cushion?

If you enjoyed this craft activity, then why not check out our little people crafts section on the blog for more ideas.


Leave a Reply